


 Metal Minimate
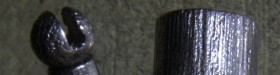

(Though I find the processes interesting, I won't go through the technical details here. Run those terms through Wikipedia if you're interested. Watch out for the lasers!)
I had heard about the process several times on various geek/tech websites, but I had always assumed you had to choose between outrageously expensive or low quality. It wasn't until I started 3D modeling that I began digging into the various options. The most amazing thing to me was that you could 'print' metal objects, I had always just assumed various types of plastic output. Since I obviously have no imagination, I chose to "print" a metal Minimate. I had already created the model in Blender for animating. All it took was a bit of clean up to remove non-manifold edges and make it 'watertight' and my model was approved and off to the printer.
Next came the waiting. Oh the waiting. According to the site it takes about three weeks to get a metal print back. Considering it's all one-off production, it's not too bad I guess. Unfortunately I didn't read all the information about a special process, yadda, yadda, yadda. Anyway... my oversight added an extra two weeks to the turnaround time.
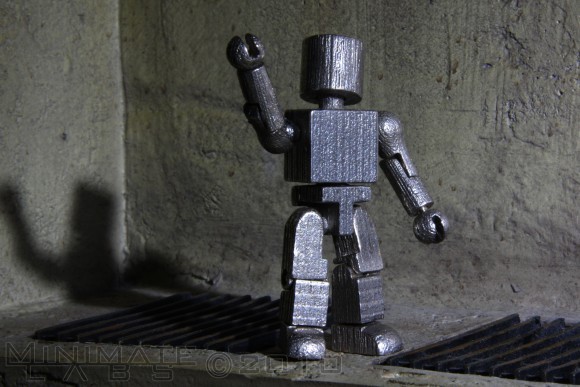
I was running some errands the day it was delivered, but couldn't resist making a detour to pick up the package. I opened it in the car. The only term I can think of to explain my reaction is giddy. It had worked. I was worried there would be a problem with tolerances, or fusing, or something. But no, the fifteen little pieces were all there and they all looked perfect. Ear to ear.
There's a difference between looking perfect and actually being perfect. I tried to slide the foot peg into the leg and it wouldn't fit. The arm wouldn't pop on the shoulder ball. In fact, none of the pieces would fit together at all. On the website, it did mention that you should scale down interlocking pieces to compensate for the overages that result from the printing process. Apparently I didn't scale enough, I'd have to file everything down just to assemble the guy.
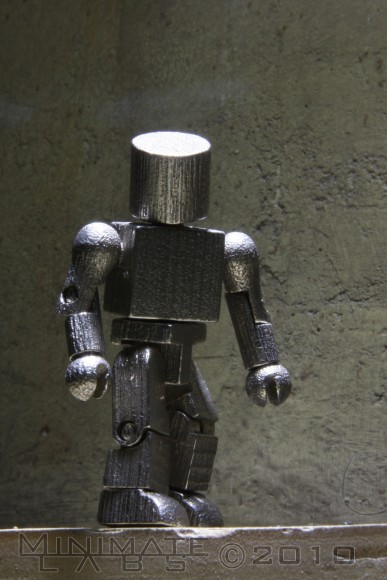
Slowly and deliberately I filed down every peg. I enlarged every socket. I was very methodical, at least initially. Over time, my mind started to wander (as it is wont to do) and ended up removing too much material from several joints. Both knees and both elbows are fairly loose. After adding some seals to the joints, they stay put for a while but don't hold up to a lot of re-posing. The next print will be better.
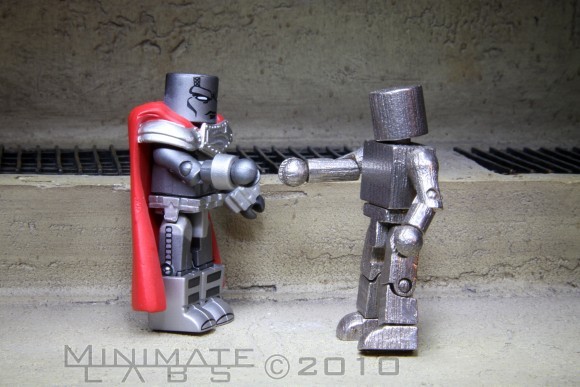
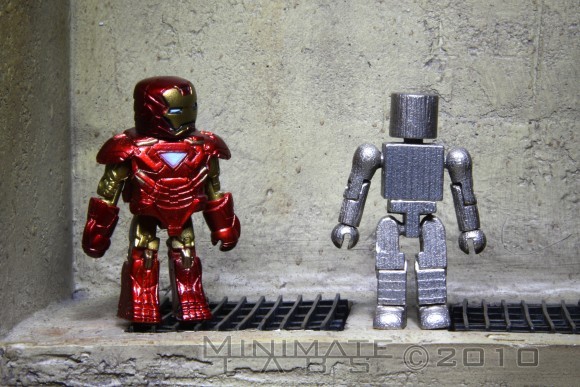
When I first got it I thought about grinding off the scan lines around the figure, but decided not to. They add character and really set him apart from his plastic bretheren. (As if the material didn't do that itself.)
The possiblities that will come from this tech are huge. I don't want to say "world changing" because that sounds cliche. But it's definitely going to change the way things are made for small print runs. I love living in the future!
